When a client walks into your gym or studio with chronic pain, limited mobility, or a nagging injury, they aren’t just bringing physical baggage. They are often carrying a significant amount of fear and anxiety. They’ve lost confidence in their body’s ability to move, and the thought of performing complex exercises can be overwhelming.
As fitness and exercise professionals, our goal isn’t just to fix a movement pattern; it’s also to rebuild that lost confidence. The secret to doing this effectively lies in corrective exercise sequencing. Knowing what exercise to pick is only half the battle. Knowing when to introduce it is what separates a frustrating program from a life-changing one.
By following this logical, three-stage progression unique to The BioMechanics Method, you can help your clients achieve maximum results from their corrective exercise programs in the shortest amount of time.
Phase 1: Regenerate and Release with Self-Massage
The first rule of corrective exercise is that you cannot effectively lengthen or strengthen a soft tissue structure that is restricted or doesn’t function correctly as a result of chronic tension or poor alignment.
That’s Why You Start with Self-Massage or Self-Myofascial Release (SMR)
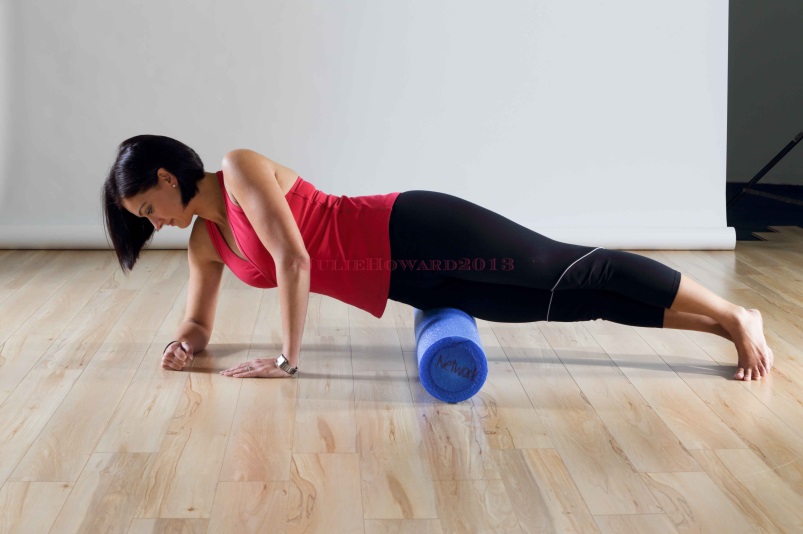
Self-myofascial release exercises and trigger-point massage are excellent entry points for anxious clients. These techniques are easy to perform and provide immediate symptomatic relief. When tension in tissues releases, clients instantly feel better and their confidence skyrockets.
- Self-Myofascial Release (SMR): Applying sustained pressure to the fascia to restore suppleness and blood flow.
- Trigger-Point Massage: Targeting specific “knots” in soft tissue that refer pain to other areas.
Tools of the Trade:
Encourage clients to use accessible tools to perform self-massage exercises like foam rollers, tennis balls, or even a Theracane®. The goal is to provide them with techniques they can perform at home or in the office, giving them a sense of autonomy over their progress.
Move to Phase 2 (see below) once the client no longer feels sharp tenderness in the target area or can perform subsequent stretching exercises with proper form.
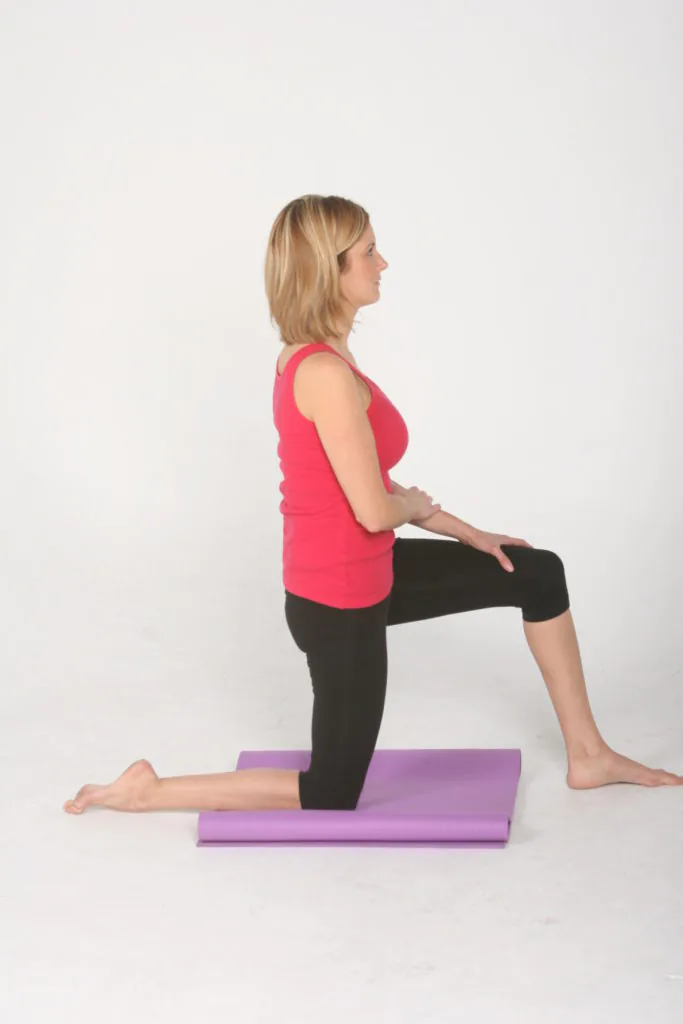
Phase 2: Realign and Lengthen with Stretching
Once the tissues are pliable, it is time to increase range of motion. Stretching isn’t just about pulling on muscles; it’s about retraining the nervous system to allow movement in directions that have been avoided for months or years.
To maximize safety and adherence during the stretching phase of a client’s corrective exercise program, follow this specific sequencing order:
1. Passive Stretching
Start here. Passive stretching involves holding a static position where the rest of the body is relatively relaxed. It’s low-stress and helps the client get comfortable with new ranges of motion. For example: A standing calf stretch.
2. Active Stretching
This introduces the concept of reciprocal inhibition. For a muscle to relax and lengthen (the antagonist), its opposite muscle (the agonist) must contract. For example: Turning a standing calf stretch into an active one by pulling your toes up toward your shin.
3. Dynamic Stretching
This is the bridge to strengthening. Dynamic stretching mimics functional movement, using controlled movements to move joints through their full range. For example: Walking backward to stretch the calf muscles in coordination with the rest of the body.
When to Progress: If the client shows control over the new range of motion and is pain-free, it’s time to move to Phase 3 (see below) and add load.
Phase 3: Strengthen and Integrate
The final phase of a corrective exercise program is where new ranges of motion are built upon and fortified. If you skip Phases 1 and 2, you are often just strengthening a dysfunction. By waiting until now to introduce strengthening exercises into a client’s program, you ensure the body is better aligned and muscles are ready to fire correctly.

The Strengthening Hierarchy
To keep the nervous system from becoming overwhelmed, introduce strengthening exercises in the following order:
- Isometric: Activate the muscle without changing its length. Great for waking up dormant muscles like the glutes.
- Concentric: Shorten the muscle to move a joint (e.g., the upward phase of a leg lift).
- Eccentric: Lengthen the muscle under tension to help slow down movement. This is vital for injury prevention.
- Kinetic Chain, multi-joint, multi-planar movements that integrate the whole body (e.g., a side lunge with reach).
When to Hit the Brakes: Knowing When to Regress
Strengthening exercises used for corrective purposes have specific objectives and are not about “pushing through the pain.” A good corrective exercise specialist is always watching for signs that the program is moving too fast.
You should regress an exercise if the client:
• Experiences sharp or increasing pain.
• Reports excessive soreness later that day or the next morning.
• Cannot maintain proper form or control.
If a strengthening exercise is too hard, go back to a stretch. If a stretch is causing guarding, go back to self-massage.
Summary Checklist for Program Design
To ensure your corrective exercise programs are a success, keep this program design checklist in mind:
1. Assess: Identify the client’s imbalances and their movement anxieties. (See previous blog for more details about this).
2. Identify: Know which muscles are causing, contributing to, or affected by imbalances. (See another previous blog for more details about this).
3. Release: Use SMR and trigger point work to revitalize tissues you have identified.
4. Stretch: Lengthen and align muscles with stretches, moving from passive to active to dynamic.
5. Strengthen: Start with isometrics, move to single-joint movements, and finish with integrated kinetic chain exercises.
By respecting the body’s logical order of healing and developing, you can improve a client’s function with sensible corrective exercise programming. Perhaps even more importantly, you can also restore their confidence in their own body and hope for the future.
If you want to learn more about which corrective exercises to use and when to introduce them into your clients’ programs check out The Fundamentals of Corrective Exercise – Module 3 of The BioMechanics Method Corrective Exercise Specialist program – the industry’s highest-rated specialty certification.
